“The longing for sweets is really a yearning for love or “sweetness.”
― Marion Woodman
Welcome to my blog, a safe place to practice imagination, love, and sweetness. I will be using this blog as a place for me to share my passions for cooking and teaching the littles! Stay tuned for sweet and savory recipes, updates from my crazy life as a teacher, and a little bit of magic!
My name is Allison, but I’m better known as Alli, or Awestrucksquid! I LOVE cooking, especially baking sweet things like cakes, cookies, and pies! I get more enjoyment out of making them and taking pictures than I do out of eating them! Haha!
I also work full-time as a teacher. I absolutely love the little humans and they have SO much to teach me! I have taught kindergarten, and now I teach third grade. I’m just trying to find where I’m best suited. So far, kindergarten has been my favorite! There is something magical about teaching little people how to be humans!
I wanted to share my love of cooking and joy of teaching with the world, but didn’t know know how to combine the two and actually get it out into the world, then I found out about blogging! I was heavily persuaded by my family and friends to actually do it, so here I am! I hope you enjoy what I have to offer! I will be sharing some teaching ideas, tips and tricks (that will be helpful whether you are a teacher or a parent!) and recipes, photos and ideas from things I cook. Please look forward to it!
Chewy.com is a website to purchase pet supplies from- and their claim is “where pet lovers shop”. Are they really as good as many people say? Why should one shop there rather than visiting their local pet store? As a fur mama and user of Chewy, I am giving my honest opinion of their services.
First of all, I want to mention the ability to create a profile for your pet. You can sign up for Chewy and make a little profile for each pet you own (or that owns you!) and Chewy will populate items your pets may be interested in. I found many new cat treats and toys for my cat, Gigi from this feature. I also made a profile for my betta fish, Lorelei and our newest addition, Lux, our super-cute dachsador puppy.
Next, they have a life-saving feature called autoship. You can add items to your autoship, such as food, cat litter, toys, beds, medicine (yes, they carry prescriptions now!) and more pet essentials and set up when you want it sent to you and how often. Due to my busy life as a teacher, I often forget to buy pet food or litter, and finding it already taken care of and delivered when I need it is a huge relief.
How about their prices? They do have better prices than your local PetSmart, and carry more than what you will find at the local pet shops. Plus, with autoship, you get another discount!
Even if the prices weren’t that great, I would still use Chewy because of their phenomenal customer service. Every year, they send my kitty a birthday card on her birthday. If I ever have any issues, which is rare, they take care of it quickly. For example, I ordered a toy that was the wrong size for my puppy, and instead of sending it back, they told me to keep it and donate it to a shelter, and refunded the money. I have heard many stories similar to this, as well as Chewy sending flowers, sympathy cards and even hand-made portraits when a customer loses a beloved pet.
The verdict? Chewy.com is truly a company that loves pets and cares about their customers. I have been highly satisfied with everything I have gotten from Chewy, and how they handled the few issues I had. It is definitely worth it to sign up and let them take care of your pet supplies.
Disclaimer: I was not paid or sponsored by Chewy.com but I am open to the idea. Call me.
We recently decided to try the meal kit delivery service, Hello Fresh. There are so many meal kits to choose from, it was kind of overwhelming! The meal kit business really took off during quarantine. Honestly, I tried Hello Fresh because we had a promotion for free meals and free shipping. Here is what I thought.
Planning meals, shopping for ingredients, cooking, cleaning up, the process never ends. As a busy teacher, I dreaded having to plan and shop for food all the time and it sucked the fun out of cooking for me. I always wanted to try a meal service, but thought it was too frivolous and expensive. I could just buy the ingredients at the store for a fraction of the cost, right?
Well…in theory…yes…
BUT, I didn’t want to. It still took a lot of planning and prep on my part to do that and just didn’t work! I was so excited when I opened up my mail and saw that promotional code, I punched it in right away and got started. I eagerly awaited my meals and hoped my days of planning and shopping were OVER.
The first box came. Nicely packaged, each meal had the ingredients neatly packed into brown paper bags, with the meats tucked under a bed of ice packs to keep cold. I liked how everything was packed together to make it even easier. I just stick the paper bags in the fridge, the meat in the freezer unless it’s one I plan to use soon, and it is all ready to go when I want to cook.
Cooking is easy! Anyone can feel like a 5-star chef. I actually am learning a lot of new tips and tricks about cooking as I make each meal. There is a recipe card for each meal, with clear instructions in 6 simple steps to be on your way to making a restaurant-quality dinner every time. (Unless you are like me and can’t make mashed potatoes if your life depended on it, but putting my personal vendetta against potatoes aside…)
Each meal has the exact amount of ingredient you need, so no more buying a whole bottle of whatever obscure sauce you need to only use a teaspoon of it and never use again! Some see this as wasteful packaging, but it’s really not as bad as I originally thought. They are trying hard to be as eco-friendly as possible.
Ordering is also so easy. On the app, you pick what meals you want. They auto-select however many you want for you, but you can totally change them or even add more if you want to. No matter what plan you select, (carb smart, quick and easy, etc.) you get to see all the meals and pick the ones you like.
In short, I have not yet gotten a meal I didn’t like. They have all been delicious and worth every penny. Even after my promo code ran out, I am still ordering it because it takes off some stress and I have a good, nutritious meal to look forward to every night. I recently upped my plan from 3 meals to 4 a week because it is well worth the cost. No more veggies are rotting in my fridge, so it is actually saving money on my grocery bill. Now I only need to plan for breakfast and lunches. If you want, Hello Fresh has that covered too with breakfast and lunch add-ons you can purchase, as well as side items.
After enjoying the convivence and ease of Hello Fresh, I never want to go back!
Disclaimer: I was not paid or sponsored by Hello Fresh.
Another thing I love is brownies! As a matter of fact, I am baking some right now as we speak! My favorites are the dense, fudgy ones! The only problem with brownies is that they aren’t very healthy. So, I made use of some vegetables to put a healthy spin on the brownie!
These aren’t as sweet as regular brownies as I chose not to add any sugar. The only sweetner is honey and the beets themselves. This recipe is versatile and you can add chocolate chips, nuts, coconut flakes, or sugar if you desire!
Below I will show you step-by-step how to make a healthier version of one of my favorite desserts!
You will need:
WET Ingredients
1 large or 2 small red beet(s), pureed
1/3 cup maple syrup or honey (I used honey)
2 large eggs
1 teaspoon vanilla extract
DRY Ingredients
1 cup flour (can also use almond flour)
2 tablespoons coconut flour
1/3 cup unsweet cocoa powder
1/4 teaspoon salt
1/2 teaspoon baking soda
1/2 teaspoon baking powder
Now, on to the recipe! You can add chocolate chips to this for the dry ingredients if you desire!
Step 1- Preheat your oven to 350 degrees and grease your brownie pan with cooking spray, or line with parchment paper ( I did both).
Step 2- After your pan is prepared, you have to boil your beets. Wash the beets and place them in a pot with about 2 inches of water and let them boil for about 30-60 minutes depending on the size of your beets. Cover the pot when the water starts to boil.
Step 3- Mix all of your dry ingredients together in a medium-sized bowl and set aside.
Step 4- After your beets are done, place them in a ice bath to stop the cooking and cool them down. After a few minutes, you should be able to peel off the skin.
Step 5- Prepare the beet puree by placing the cooked, skinned beets in the food processor and blend for about 2-3 minutes until the puree forms.
Step 6- Mix all of the wet ingredients together in a separate bowl from the dry. Add the dry ingredients to the wet and mix.
Step 7- If you add chocolate chips, this is where you would melt 1/2 cup of chocolate chips and fold them into the brownie batter.
Step 8- Pour brownie batter into the pan and spread evenly with a spatula. Top with chocolate chips if desired.
Step 9- Bake for 18-21 minutes (depending on how fudgy and gooey you want them).
If you want them to be sweeter, I suggest adding the chocolate chips. However, if you are going for a less sweet taste, you can leave them out. This recipe is a great use of beets and turns out delicious! You can even eat them for breakfast and not feel bad about it! 🙂
School is either back in session or going back for you very shortly- we go back next week in this district of North Carolina. Being a teacher for going on five years, I’ve had my share of creating and distributing supply lists, and heard the complaints of parents. Why exactly 24 glue sticks? Why do they have to be Crayola crayons?
Well, all of your questions are about to be answered. There is a very valid reason we suggest specific things, and no, Rose Art won’t cut it. It’s not that we enjoy being brand snobs, just some supplies are better than others, as you will see explained below! Here are the top 10 school supplies teachers really want…buy these and your child’s teacher will love you all year. Teachers, let me know what you think about my list in the comments!
10. Durable, Plastic Folders in a Variety of Colors
I teach third grade, and these folders are important. For anything from homework, to parent communication, to science or social studies, having a few good folders (durable, plastic ones with two-pockets and prongs) are useful for everything. Think about this- rather than asking my students to get out their homework folder, and then spend 20 minutes helping them find the cute kitten print or puppy folder they used for homework, it would be easier to say “Get out your orange folder”. They all know what orange is and it makes finding what they need much faster and easier. In a perfect world, I would color-code all the folders for each specific subject or purpose. Please, help a sister out and buy these. It’s also important that they’re plastic as the paper ones fall apart very fast.
9. Ear Buds/Headphones
For once, these are not a brand specific item. In my classroom, my students use Chromebooks and computers or iPads regularly- and they need headphones or earbuds to hear them. With 20 Chromebooks or iPads all making noise at once makes it hard for them to hear and hard for me to keep my sanity. Earbuds or headphones solve this problem, and I would like each kid to have their own pair to use as needed. No, you don’t have to go out and buy Beats by Dr. Dre, they can be cheap, Dollar Tree earbuds. If your child doesn’t like the in-ear buds, a simple pair of headphones will work as well. As long as they work, we don’t care. We are grateful when computer time comes and they don’t have to ask us to scrounge up a pair of headphones.
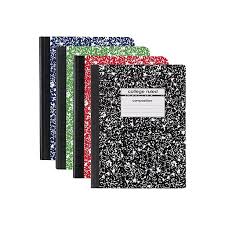
8. Composition Notebooks
I really prefer these notebooks to the classic spiral-bound…for good reasons. The pages don’t rip as easily, and they wiry metal spirals don’t eventually come undone and stab a kid through their skin. (It’s happened, and it wasn’t pretty. Kids make prison shanks out of that stuff!)
Also, notebooks are really useful in the classroom. I personally use at least three…one for English to record anchor charts and information I want them to remember and review later, one for Math facts and formulas, then another for journaling. Y’all, journaling is so great. I have my students journal in the morning with a thought-provoking prompt, such as the age-old question…”Do you prefer pizza or tacos?” It’s fun, they love it, and they’re well on their way to composing a strong opinion paper, which is a third-grade writing standard. I also use journal prompts throughout the day and for social-emotional support, such as, allow students to write down how they feel to help relieve the stress. Buy notebooks for your teachers and encourage them to use journaling in the classroom if they don’t.
7. Pencil Pouch
Another cheap, simple item you can get at your local Dollar Tree, the pencil pouch. I so much prefer these to the plastic pencil boxes, they’re less bulky, take up less room in desks, and don’t explode when they fall, spilling the contents and making a disrupting “thud”.
I love organization and these keep all of the kid’s stuff in one simple container that is soft, easy to put in desks (or attach inside binders if you use them) and have a quiet zipper for easy removal of needed supplies. My co-teacher bought each of the student’s one this year, and I love them! When considering what to get your child for school, I suggest the pouch rather than the box. Think of the teachers!
6. Sanitizing Wipes
These don’t have to necessarily be Clorox like the photo, but consider buying some for your dear child’s teacher. It’s no secret that children are germ-ridden little critters, and these help all of us stay healthy. At least once a week (once a day during flu season) I wipe off all the desks with these to keep the diseases at bay (and the doorknobs, the computer keyboards, and every other surface they touch). I’m very susceptible to catching every cold that goes around so these give me peace of mind. Often, parents skip these as they don’t think they’re a needed school supply. THEY ARE. Think of our health, and the health of your children when they sit at their desk each day.
5. Hand Sanitizer
On the same thought as the disinfecting wipes, we also appreciate hand saniziter, or as the children lovingly call it, “hanitizer”. Working together with the wipes and also regular hand-washing with soap and water, we CAN stop the spread of disease! I usually set the bottle next to the tissues (another hot commodity in the classroom, so kids can get a squirt after they are done using the tissue and return to their seat without incident. This way, no need to interrupt class to go wash their hands. Also, if a kid coughs into their hands they can also go get a squirt, and each child gets one before lunch. I know some schools ban the use of this as well as the wipes, but our school does not and I use them religiously.
4. Crayola Crayons or Colored Pencils
I love a good set of crayons! Crayola really are the best, because they last longer, have better color, and don’t break as easily. Most other crayons are too waxy, break instantly, or don’t have “true” colors. We aren’t being picky, we know what works best. For older kids, colored pencils are great too. However, they won’t be able to be sharpened in a regular sharpener, it ruins them- so invest in a hand-held sharpener or make your teacher’s year and buy a sharpener for colored pencils. Yes, they make those!
3. Elmer’s Glue Sticks
In my dream world, a beautiful glue stick tree grows right outside my classroom window. These are a necessary supply, and there never seems to be enough. Kids use this stuff like it’s going out of style, and even in third grade, they apply it heavily when they don’t really need to. Or, they lose the cap and it dries up. This is why we ask for 24 glue sticks. Also, we like the purple kind so kids can actually see where they apply it to, this is especially important in younger grades.
2. Tichonderoga Pencils (Pre-sharpened if you love me)
These are really the best pencils. They last forever and are worth the investment. Plus, if they are pre-sharpened, I don’t have to waste time the first day sharpening a hundred pencils. Please, for the love of all that is good, don’t buy those cheap pencils with the plastic “pretty” coating, they end up twisting up in the sharpener and can burn up the motor, plus the lead seems to constantly break. Don’t skimp on quality and buy the good kind. We want these for a reason.
And at number one…Tissues
The number one supply I am always happy to get are tissues. The kids go through these like crazy, sometimes a box a day. Especially during cold, flu and allergy season. I always run out of these early on. Do that teacher in your life a favor and buy an extra box when shopping for school supplies.
Those are my top ten supplies for a good school year! Although, based on what grade and the individual preferences, your supply list may vary. Just know, the teacher has a very good reason for requesting what they do. What else would you add? Let me know in the comments!
Today, I’m going to show you a super easy snack/lunch/dinner idea you and your kids will love!
I used to buy a ton of Hot Pockets every week, even though I knew they weren’t really the best for me, health-wise. Then, I learned how to make my own! It’s a favorite in my house and I often serve them when friends are over and they are always a hit! You can replace the filling with anything you want, to make your own easy, homemade Hot Pockets!
What you will need to make this is:
1 refrigerated pizza crust (I use thin, you can use whatever strikes your fancy)
1 jar of pizza sauce
Pepperoni (or any other topping of your choice)
Shredded cheese (you can use mozzarella or make life easy and use a blend of your favorites!)
Italian and garlic seasonings
Olive oil
With so few ingredients and endless possibilities, this recipe is a great and fun last-minute meal or snack! Now, on to the recipe, with step-by-step pictures and instructions!
Step 1- Lay out a sheet of parchment paper on a baking sheet. Open and unroll your pizza crust on the sheet. I stretched mine out just a bit so it would be longer. Preheat the oven to 425F.
Step 2- Cut the pizza crust into six squares. You can even make smaller or bigger ones if you want, just cut less or more pieces.
Step 3- Add a dollop of pizza sauce, some cheese, and pepperoni or your topping of choice to the top of the pizza crust squares. Try to keep it on one side so it’s easier to fold later. I used 2 pepperonis per pocket, but you could add more or less if desired. Sprinkle with garlic powder and the Italian seasonings.
Step 4- Fold over the top corner of your pizza crust to make a triangular-shaped pocket. Press down the corners with your fingers or a fork. Brush the tops with a little olive oil and sprinkle with garlic, Italian spices, and some cheese.
Step 5- Bake at 425F for 10-13 minutes until the tops are golden.
Step 6- Serve with pizza sauce for dipping, as pictured below.
Another love of my life is my Instant Pot! I got it as a birthday present and it’s one of the BEST cooking appliances I’ve ever used. Cuts cooking time waaaay down, and can cook frozen food in minutes! (Great for when I forget to thaw.) Plus, I don’t have to use the oven in this already sweltering summer weather.
Today, I’m going to show you a simple way to cook juicy, tender, flavorful chicken breasts in the Instant Pot. This can also be done in an oven, it will just take a little longer and you will need to sear them in a frying pan before baking. This is a great weeknight meal, paired with your favorite sides as it only takes 10 minutes or less! It’s also extremely versatile, you can use any seasonings or liquid that you want! (Word to the wise: the Instant Pot requires that you use at least 1 cup of liquids when pressure cooking!)
Let’s get started! Step-by-step instructions and pictures are below!
What you will need:
Instant Pot with trivet insert (a trivet came in the box with my Instant Pot, you can also buy one on Amazon for around $5)
Chicken breasts (use as many as you need for who you are feeding, up to five breasts, you may need to increase cooking time a little for more breasts)
Seasoning mix: Any mix of seasonings you want. I used dried chives, onion powder, garlic powder, sea salt, Italian blend, paprika, and Tony Chachere’s creole seasoning)
Olive oil
Broth (any broth you want to use, I used vegetable)
How to make it!
Step 1- Mix your seasonings in a small bowl with 1 table spoon of olive oil and 1-2 tablespoons of your broth to make a paste.
Step 2- Trim your chicken breasts and place on a plate or in a shallow bowl. Cover the breasts (both sides) with your spice mix. Try to get it as even as possible.
Step 3- Set your Instant Pot to saute and add some olive oil. Wait a few minutes for it to heat up, then add your chicken breasts. Sear on each side for about 2 minutes, enough to create a delicious crust on the chicken. (This is not a necessary step, but it makes the chicken taste sooo good!) If you’re short on time, you can skip this.
Step 4- Remove the chicken from the Instant Pot and place on a plate. Set aside for a moment. Add 1 cup broth of choice (vegetable, chicken, beef, or just water) and use a spatula to scrape the bottom of the Instant Pot. (Those bits from the chicken will add flavor!) Put in the trivet and place the chicken breasts on top. The trivet should sit right above the broth.
Step 5- Put the lid on your Instant Pot, make sure the valve is set to sealing, and press the button for pressure cook. Set the timer for 5 minutes (10 if your chicken is frozen or they’re really large breasts) and make sure it’s set to high pressure. Allow the pressure to release naturally, this will take about 10 minutes. This is how you get juicy chicken, it also allows the chicken to continue the cooking process.
Step 6- Serve with sides of your choice! You can make mashed potatoes, rice, veggies, anything that fits the flavor you’re going for. Pictured is my chicken breast served with sauteed Swiss chard, garlic, onion and fennel fronds! (Chard and fennel compliments of Misfits Market, it’s something I threw together to use some of my veggies. Use my code below to get 30% off your box!)
Join me on my mission to help end food waste by signing up for Misfits Market! Click here to see what they’re all about and sign up using my code to get 30% off your first box! You’ll be glad you did!
It’s no secret- I love chicken! Due to a sensitive stomach and just the cost in general- I don’t eat a lot of red meats. Chicken, pork and recently turkey, are my go-tos for most of my meals. It’s cheap and versatile, as I’m about to show you…
What you will need to make this is:
Chicken breasts, cut into 3 large chunks (use as many breasts as you think you need depending on how many people you’re feeding!
2 sleeves of Ritz crackers or other variant. I used the Food Lion brand.
Salt (to taste)
Pepper (to taste)
1/2 cup of milk
3 cups of cheddar cheese
Italian seasonings (to taste)
For the sauce:
1 can cream of chicken soup
2 tablespoons of sour cream
2 tablespoons of butter (I used light butter)
Now, on to the recipe, with step by step pictures and instructions!
Step 1- Preheat you oven to 400 degrees Fahrenheit. Cut each chicken breast into 3 large chunks, especially if yours are big like mine were. If you have smaller chicken breasts, you could cut them in half.
Step 2- In a food processor, grind up the crackers into a fine, almost bread-crumb like consistency. (If you don’t have a food processor, you can put them in a zip-lock bag and crush them with a rolling pin or by hand! They may not be as fine as you’d like, but it works!)
Step 3- Pour the milk, cheese, and cracker crumbs into 3 separate small bowls. Add salt, pepper, and any seasonings you’d like and mix them with the cracker crumbs. Grease your pan with cooking spray and have it ready to place your chicken.
Step 4- Dip each piece of chicken into the milk, then the cheese, pushing it on the chicken with your fingers. Some of it will fall off, it’s okay! Press the chicken in the cracker crumbs, then place it in your pan. Repeat the process with the rest of your chicken. The cheese has trouble sticking on, but it will still turn out okay even if some falls off. Sprinkle Italian seasonings over the top.
Step 5-Cover the pan with foil and bake at 400 degrees for 35 minutes. Remove the foil and continue to bake for an additional 10 minutes until the edges of the chicken are golden brown and crispy.
Step 6-In a medium saucepan, combine the cream of chicken, sour cream, and butter with a whisk. Stir it over medium-high heat until the butter is melted and the sauce is hot. Serve it over the chicken. (Shown here with a size of air-fried ranch radish wedges)
Ya’ll, this meal is heavenly! I’ve already mentioned how much I love cheese and chicken, and this combines two of the best things in the world into one dish. Packed with cheesy flavor and the crunch of the cracker crumbs, made even better by the sauce on top…this is a meal anyone would enjoy. You can even substitute the cracker crumbs for Nacho Cheese Doritos crumbs (hence the name, Cheesy “Chip” Chicken for an even more flavor-packed meal.
The radishes for the side are compliments of Misfits Market, you can learn more about them here. Don’t forget to sign up using my code for 30% off to get fresh, affordable, organic fruits and veggies delivered to your door once a week (or every two weeks, whatever you choose!) to be on your way to creating more healthy and plant-based meals for your family!
Today, I am going to show you how to make Eggplant Rollatini, or as it’s called by the Italian name, Involtini. I am proud of my Italian heritage, and love to show it through cooking Italian food. What can I say? I love saucy, cheesy, pasta-y goodness!
What you will need to make this is:
A 1 pound eggplant, cut into 8 slices.
Salt (to taste)
Pepper (to taste)
Olive oil
For the filling:
1/2 cup ricotta cheese
1 egg
Italian seasonings
Zest from 1 lemon
Salt (to taste)
Pepper (to taste)
Shredded Italian cheeses
1 jar (32 oz) of Pasta/Mariana sauce (use more or less depending on how much you like sauce)
Aren’t my cat salt and pepper shakers cute? Yes, I love shopping at Food Lion! I’m a sucker for cash rewards and coupons, which I get an abundance of with my MVP membership there! (I like to see how much money I can save!) *Not a sponsor. 🙂
I got the eggplant from a food delivery service called Misfits Market. Ya’ll, you should check them out. Visit their website here to see what they are all about. All of this was possible because they sent me an eggplant, which I would have never thought to cook with before. I also put my referral code down below so that you can save 30% if you subscribe! Everything I have gotten is SO fresh and tastes great!
Now, on to the recipe, with step-by-step pictures and instructions!
Step 1 – Preheat oven to 425F. Cut the top and bottom off of your eggplant(s) and slice lengthwise into 6-8 slices, about 1/2 to 1/4 inch thick.
Step 2- On a parchment paper lined baking sheet, place your sliced eggplants in a single layer and sprinkle with salt, pepper, and olive oil. Bake these for 13-15 minutes or until they are soft enough to roll. Set aside to allow time to cool. Please do. Don’t get any burns. Not on my watch.
Step 3- While those are in the oven, begin making the filling. Combine the ricotta, egg, seasonings, salt, pepper, lemon zest, and some of the cheese in a mixing bowl and mix well.
Step 4- Spread about 1/4 cup (depending on the size of your baking dish) marinara sauce on the bottom of your baking dish. When the eggplants are done (and cool), place them on a work surface and scoop about a tablespoon of filling on the wide side and roll up. Repeat with the remaining eggplant slices.
Step 5- Place rolled eggplants seam side down in your baking dish. Pour remaining marinara sauce over the eggplants and cover with the cheese. Bake for 25-30 minutes until the cheese is golden brown and the sauce is bubbling. Remove from oven and let sit for about 5 minutes. You can garnish with fresh basil or seasonings if you’d like, or more cheese! 🙂
Finished product!
These were SO good, and vegetarian (lacto-ovo)! Great for Meatless Monday or a light mid-week meal. If you want to add meat, I’d suggest using a meat sauce or maybe adding ground beef or sausage to the filling! I haven’t tried it, but I’d like to next time. This can also be made using chicken or veal in place of the eggplants.
I am NOT a sponsor (yet) but I just love them that much. ❤
Click on over there to sign up and get your 30% off! You’ll be glad you did. Really. Their stuff is amazing, and you’ll be saving a ton on your grocery bill and won’t even have to leave your house to get fresh fruits and veggies! It’s a win-win all around.